Here at Zotero headquarters we are always delighted to support other open projects, and today marks another step closer to seamlessly integrating Zotero into the Open Access web. Zotero is now compatible with all seven Public Library of Science (PLOS) journals. Users can now capture metadata and full-text PDFs from all the PLOS journals.
Features Category
Two Billion Photos Now Zotero Ready: Zotero and Flickr
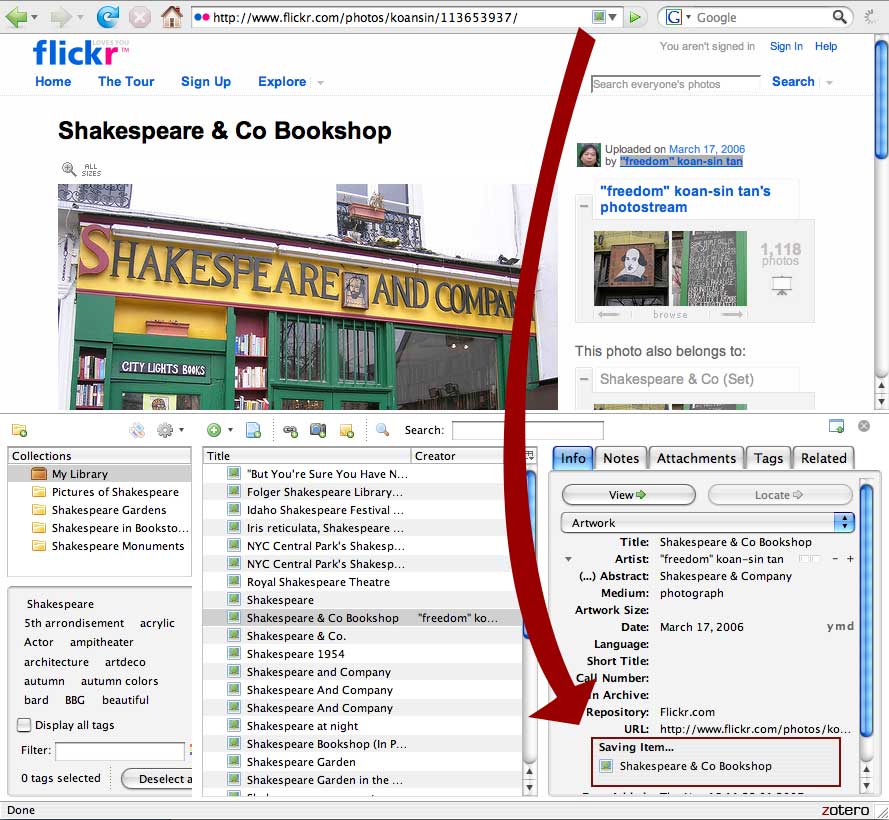
Zotero can now automatically capture images from Flickr. Currently users can capture images, tags, and other metadata from individual image pages and search results pages. In the future, we will enable users to capture photos and their metadata from other kinds of Flickr pages, but the current release enables everything from using Zotero as a web photo album to a rigorous tool for analyzing photography online.
Zotero isn’t just for books and bibliographies, it is also an exciting platform for a wide variety of digital collecting. Take a moment and try it out, capture a few of the two billion Zotero enabled photos at Flickr.com
Using Zotero With Microsoft Word Screencast

We are happy to announce a new screencast demoing Zotero’s Microsoft Word Plugin. This quick tour of the plugin demonstrates how to add references to documents and generate bibliographies from the growing list of bibliographic styles Zotero supports.
The Word plugin offers a powerful way to integrate your Zotero collection with your writing process, but it is worth noting that it is only one of many ways to do so. Zotero’s OpenOffice plugin offers similar functionality for OpenOffice users—check out Daniel de Byl’s screencast to see this plugin in action—and our Google Docs screencast demonstrates the power of dragging and dropping references into any text field. Each of these features and plugins bring us closer to our goal of seamlessly integrating your Zotero collection with the tools you use to write, compose and communicate.
Flocking to Zotero
One of the exciting new features in our most recent release is compatibility with the Flock browser. We previously blogged about Zotero and Netscape, but Flock integration brings a distinct flavor to the Zotero experience.
Watch this brief screencast to see the synergistic way Flock connects your Zotero collection with its media tool-bar and web clipboard to seamlessly add bibliographic content to blogs, forums, and web documents.